Text to STL: Generate 3D Print-Ready Models from Text
The world of 3D printing is constantly evolving, and one of the most exciting recent developments is the ability to generate 3D models directly from text prompts. This technology, a process often called text to stl, is making 3D creation more accessible than ever before. Instead of needing complex CAD software, you can now simply describe what you want to create and let an AI do the heavy lifting. The result of a text to stl conversion is often a standard STL file, ready to be sliced and sent to your 3D printer.
Several platforms have emerged as leaders in this space, each with its own strengths. Tools like Meshy, Tripo, and Hyper3D's Rodin are leading, offering different approaches to text-to-STL generation. Whether you're a seasoned 3D artist or a complete beginner, these tools provide a new and intuitive way to bring your ideas to life. This article will explore how text to stl works, compare the top tools available, and walk you through the process of creating your own 3D models from text.
What is Text to STL and How Does It Work?
At the basic level, the text to stl process is where an AI model interprets a natural language description and generates a 3D model in the STL file format. This process, a subset of the broader text-to-3D field, is particularly focused on producing models that are optimized for 3D printing. But how does a machine turn words into a physical object?
From Prompt to Pixels: The AI's Role
The process starts with a sophisticated AI model, often a diffusion model or a NeRF (Neural Radiance Field), that has been trained on a massive dataset of text and corresponding 3D objects. When you input a prompt like "a small, detailed castle with a tall spire," the AI doesn't 'understand' the words in a human sense. Instead, it uses the statistical relationships it learned during training to generate a representation of the object. This is often a multi-step process, starting with a rough shape and progressively adding detail.
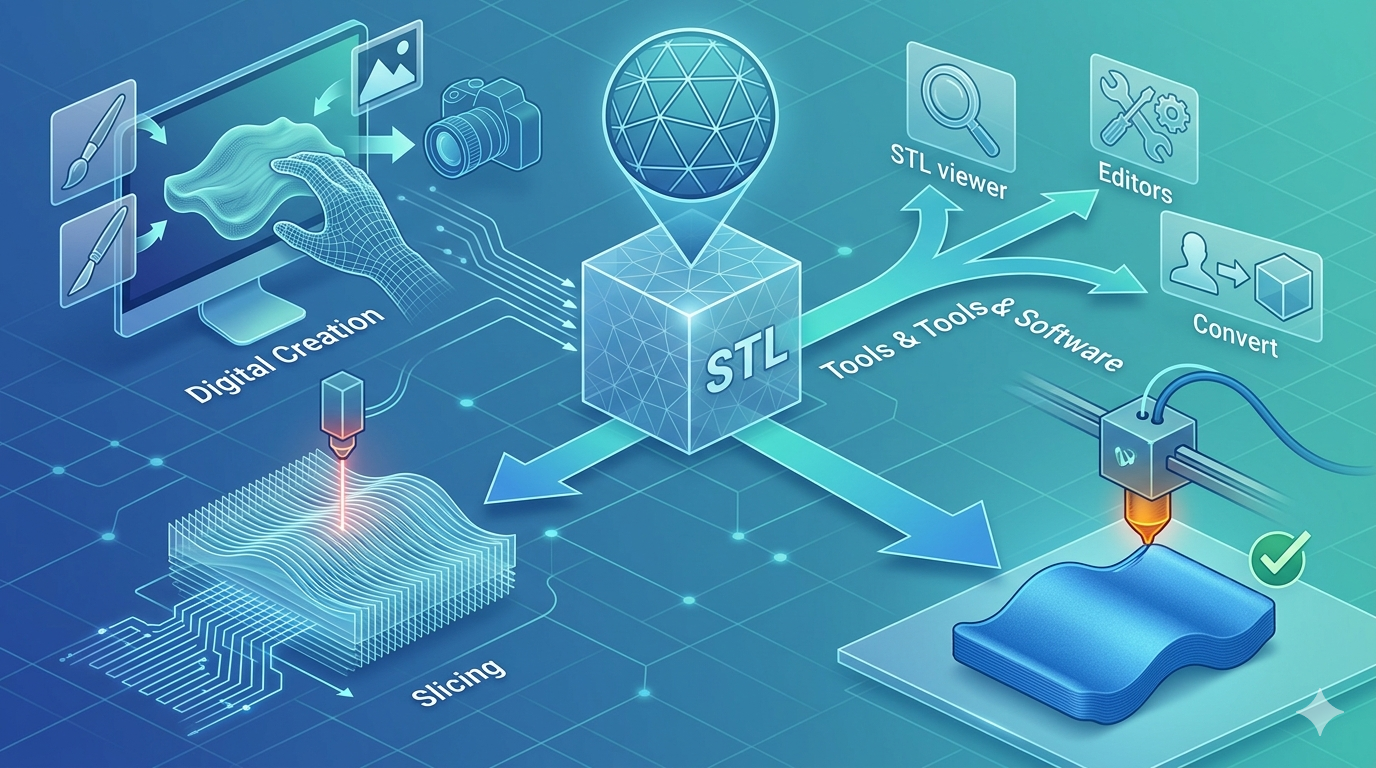
Generating the Mesh: Creating a Solid Object
Once the AI has a clear idea of the object, it needs to create a 3D mesh. This is a digital scaffold made of vertices, edges, and faces that define the shape of the 3D model. The quality of this mesh is critical for 3D printing. A clean mesh with good topology will print smoothly, while a messy one (often called "triangle soup") can lead to printing errors. The final step is to export this mesh as an STL file, a standard format that is understood by almost all 3D printers.
Top Text to STL Tools Compared
With so many text to stl tools available, it can be tough to know where to start. Here?? a breakdown of the leading platforms for text to stl conversion.
| Tool | Best For | Top Strength | Key Limitation |
|---|---|---|---|
| Meshy AI | Texturing & UX | Best textures | Rougher geometry |
| Tripo AI | Game dev pipelines | Auto-rigging | STL export issues |
| Hyper3D | Topology & ecosystem | Cleanest geometry | Less versatile for stylized |
| Luma AI | Rapid prototyping | Speed | Triangle soup topology |
Meshy AI
Meshy AI has quickly gained a reputation for its outstanding texturing capabilities and polished user interface. If your primary goal is to create a model that not only has a good shape but also looks fantastic right out of the generator, Meshy is a strong contender.
- Pros: The texturing engine is second to none, producing rich and detailed PBR materials. The UI is clean and intuitive, making it easy for beginners to get started. It also offers a great library of styles, including voxel and low-poly aesthetics.
- Cons: While the textures are great, the underlying geometry of the generated meshes can sometimes be a bit rough, especially for more complex objects. It can also be slightly more expensive per generation compared to some alternatives.
- Best for: Artists and designers who prioritize high-quality textures and a smooth user experience.
Tripo AI
Tripo AI is a favorite among game developers, and for good reason. It?? built for speed and efficiency, with features that cater directly to game development pipelines. The platform is known for its fast generation times and generous free credit system.
- Pros: Tripo is incredibly fast and includes powerful features like auto-rigging and segmentation, which are huge time-savers for game assets. The free credits make it very accessible for experimentation.
- Cons: Some users have reported issues with STL exports, noting that the normals can be inconsistent, which may require fixing before printing. It's also less specialized for creating detailed human avatars.
- Best for: Game developers who need to create pipeline-ready assets quickly.
Hyper3D (Rodin)
Hyper3D, with its Rodin AI engine, stands out for its ability to produce exceptionally clean and sharp geometry. This focus on high-quality topology makes it a top choice for creating character models and other objects where a clean mesh is critical.
- Pros: The geometry quality is arguably the best in its class, resulting in models that are ready for animation or 3D printing with minimal cleanup. The integrated OmniCraft suite provides an all-in-one workflow, allowing you to generate, texture, and edit your model in one place. Its multi-view input support is also a significant advantage.
- Cons: Because it excels at character and avatar generation, it can sometimes feel less versatile for creating stylized, non-organic props.
- Best for: Users who need clean, high-quality topology, especially for character models and avatars, and prefer an all-in-one workflow.
Luma AI (Genie)
Luma AI's Genie is all about speed. It?? designed for rapid prototyping and getting ideas out of your head and into a 3D form as quickly as possible. If you need to iterate on concepts quickly, Luma is an excellent tool for the job.
- Pros: The generation speed is a major plus, making it perfect for brainstorming and early-stage concept design.
- Cons: The speed comes at a cost. The topology of the generated models is often described as "triangle soup," meaning it's a messy collection of triangles that isn't suitable for production or direct 3D printing without significant cleanup in a tool like Blender.
- Best for: Designers and artists who need a tool for rapid prototyping and concept sketching.
My First-Hand Experience with Hyper3D Rodin
To get a real feel for the text to stl process, I took the Hyper3D Rodin text-to-3D model generator for a spin. The interface is clean, with a prominent text prompt bar at the top and a gallery of generated models below. I decided to test it with a couple of different prompts to see how it would handle varying levels of detail.
My first prompt was "a detailed, ornate fantasy sword." I left the mode on the default setting and hit generate. Within about 30 seconds, I had four different models to choose from. The geometry was impressive; the edges were sharp, and the overall shape was well-defined. I selected the one I liked best and was taken to the 3D viewer. From there, I could see the model from all angles and inspect the mesh. The topology was indeed very clean, with well-organized quads and tris, which is a huge plus for 3D printing. I then clicked the export button and was presented with a list of formats, including STL, FBX, OBJ, GLB, and USDZ. I chose STL, and the file was ready to download instantly.
For my second test, I wanted to try something a bit more organic. I used the prompt "a cute, cartoonish dragon with small wings." This time, I switched the generation mode to "Focal" to see if it would make a difference. The results were noticeably different. The Focal mode seemed to produce a more stylized and character-focused model, which was exactly what I was looking for. The dragon was adorable, and the mesh was just as clean as the sword's. I also took a moment to explore the OmniCraft sidebar. I was able to quickly apply an AI Texture Generator to the dragon, which gave it a cool, scaly appearance. The whole text to stl process, from text prompt to a textured, downloadable STL, took less than five minutes. It?? a very smooth and intuitive workflow.
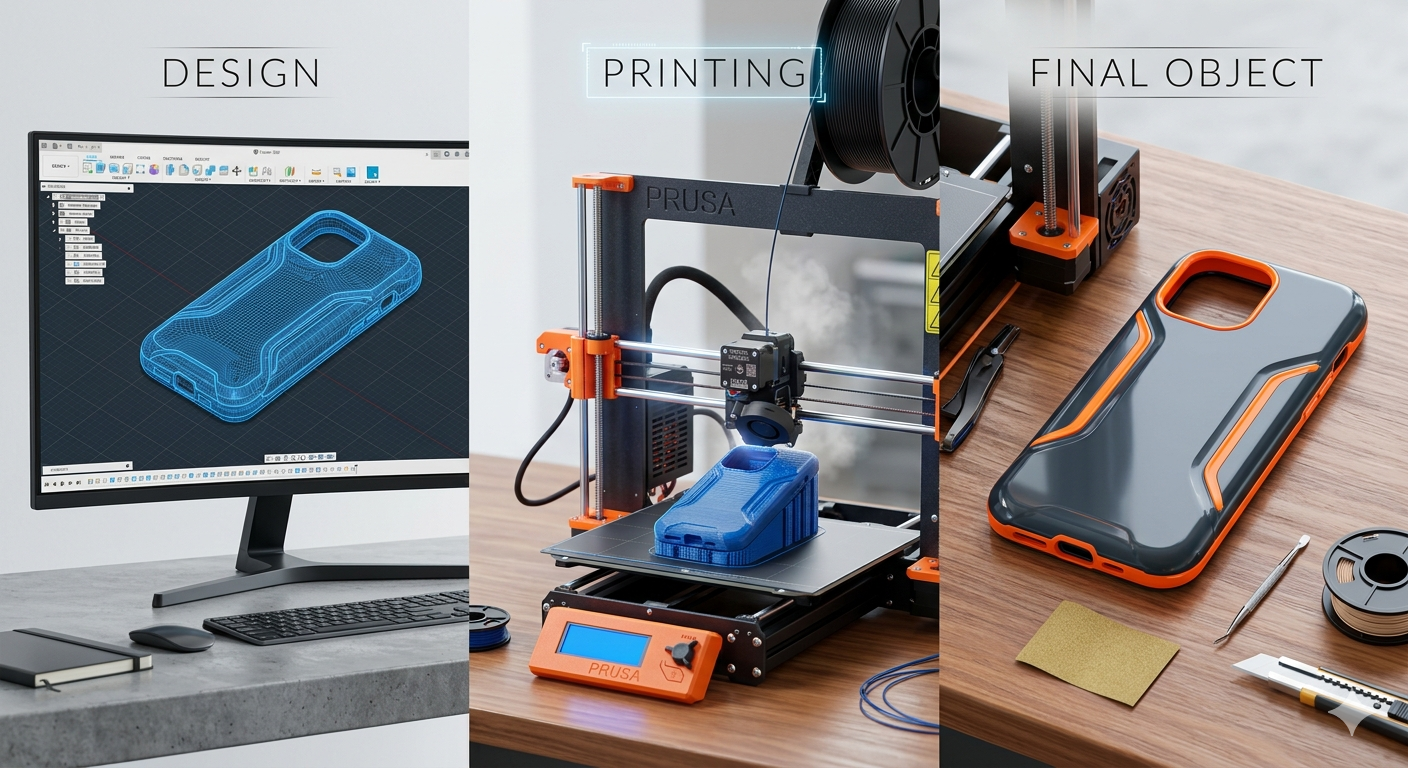
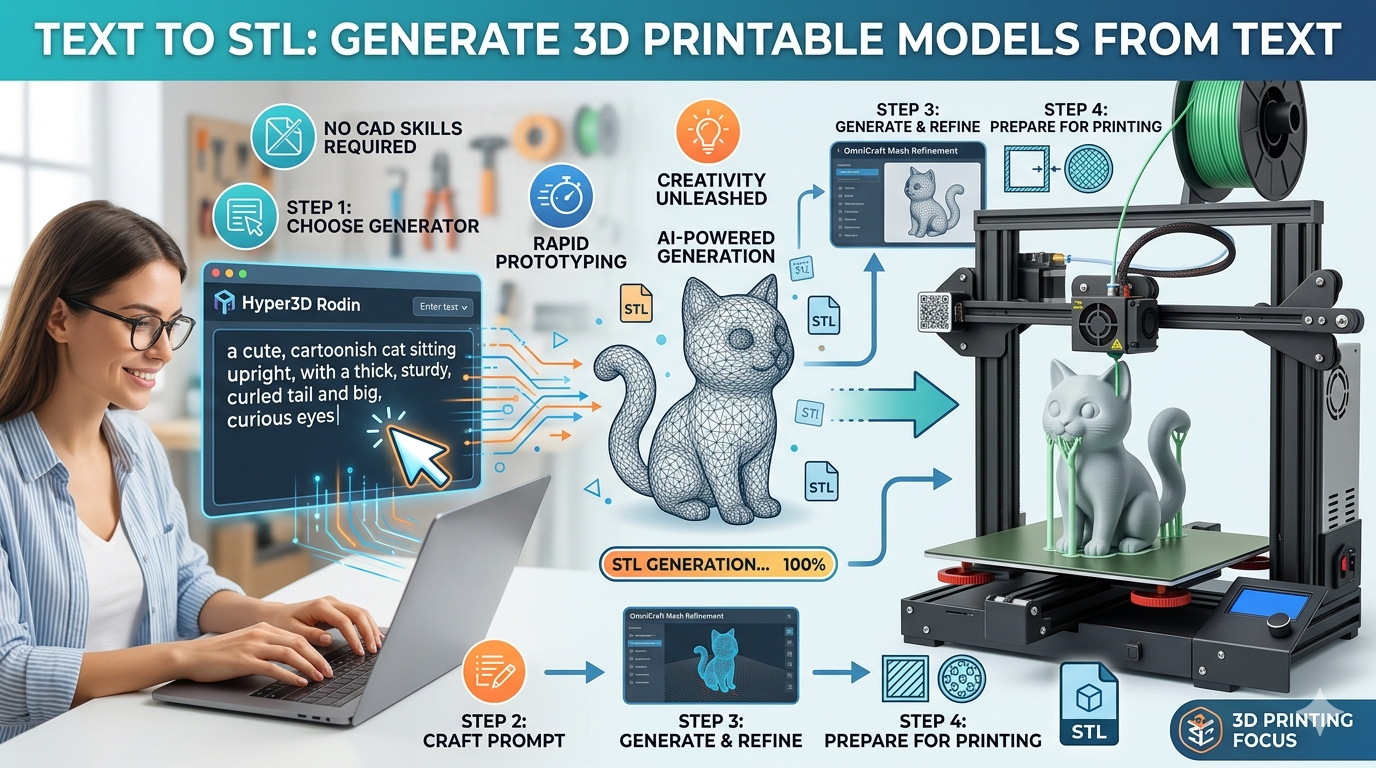
Step-by-Step Guide: From Text to a 3D-Printed Object
Ready to create your own 3D models with text to stl? Here?? a simple workflow that you can follow.
1. Choose Your Generator: Start by selecting a text-to-3D tool. For this guide, we'll use the Hyper3D text-to-3D model generator, but the basic steps are similar for most platforms.
2. Write a Detailed Prompt: The key to getting a good result is a well-written prompt. Be as descriptive as possible. Instead of "a car," try "a classic 1950s convertible sports car with chrome details."
3. Generate and Select: Enter your prompt and let the AI work its magic. Most tools will give you a few options to choose from. Pick the one that best matches your vision.
4. Inspect the Model: Before you download, take a moment to inspect the 3D model. Use the platform's viewer to check for any obvious flaws in the geometry. A good STL file viewer can also be helpful here.
5. Download the STL File: Once you're happy with the model, export it as an STL file. This is the format you'll need for your 3D printer's slicing software.
6. Slice and Print: Open the STL file in your slicer of choice (like Cura or PrusaSlicer), prepare the model for printing, and send it to your 3D printer. You've just turned words into a physical object!
Use Cases and Applications for Text-to-STL
The ability to quickly generate 3D models with text to stl has a wide range of applications, from hobbyist projects to professional workflows.
- Rapid Prototyping: Quickly create physical prototypes of new product ideas without needing to model them from scratch.
- Custom Miniatures and Game Pieces: Design and print your own custom miniatures for tabletop games like Dungeons & Dragons.
- Educational Models: Teachers and students can create 3D models of historical artifacts, scientific concepts, or anatomical structures.
- Personalized Gifts: Generate unique and personalized items, like custom keychains or phone stands.
- Architectural Visualization: Create rough models of buildings and furniture to quickly visualize a space.
Frequently Asked Questions (FAQ)
What is the best AI for text-to-3D?
There's no single "best" AI, as it depends on your needs. For the cleanest geometry and best results for characters, Hyper3D's Rodin is a top choice. If you prioritize high-quality textures, Meshy AI is excellent. For game developers needing a fast workflow, Tripo AI is hard to beat.
Can I use an image to create an STL file?
Yes, absolutely. Many platforms that offer text-to-3D also have an image-to-3D feature. This is great for turning a 2D logo or a photograph into a 3D model. You can use an image-to-STL converter to do this.
Is text-to-STL free?
Many platforms offer free trials or a certain number of free generations. For example, Tripo AI is known for its generous free credits. Hyper3D also offers a free tier to get you started. However, for heavy use or access to premium features, you'll likely need a paid subscription.
How detailed can the generated 3D models be?
The level of detail depends on the platform and your prompt. Modern AI models can produce surprisingly intricate and detailed models. However, there are still limitations. Very complex scenes with multiple objects or highly specific details can be challenging for the current generation of AI.
Do I need a powerful computer to use a text-to-3D model generator?
No, you don't. Most text-to-3D platforms are cloud-based, which means all the heavy processing is done on their servers. All you need is a web browser and an internet connection to use a text-to-3D model generator.